If you are checking your website's performance using Lighthouse, you might have noticed that one recommendation is to use "Serve images in next-gen formats" and by that, they mean WebP.
According to Google, if you compress PNG images, you will save 26% on average.
Compared to JPEG with a similar SSIM setting, the difference is even more significant — 25%-34% depending on image type. We tested those claims on our JPEG photos from a smartphone, read on to learn about the results.
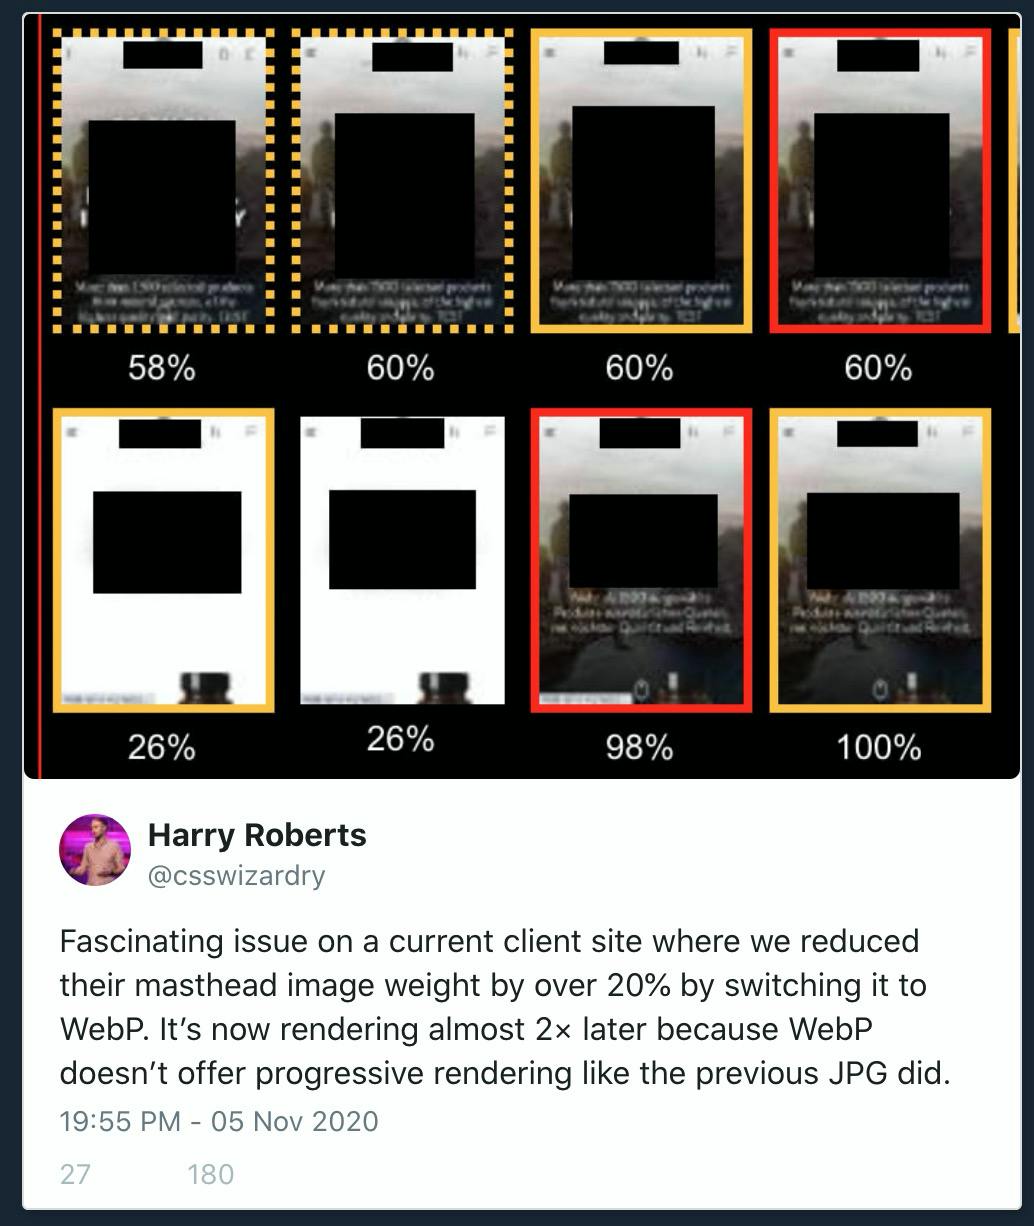
Note: Be careful what type of image you compress with WebP because it has no progressive loading like JPEG, so your hero image in WebP might negatively impact First Contentful Paint.

If WebP is so good, why isn't everyone using it?
In short: Tooling.
- Your phone takes photos in JPEG.
- Your computer takes screenshots as PNG or JPEG.
- When you download images from a stock photo service, it's JPEG.
- Logotypes are often SVG.
- Your operating system most likely does not know how to preview WebP natively, so you need to download special software to do it.
All these are barriers to adoption for this format, which apart from having better compression, has an alpha channel, which is missing from JPEG.
Our case
One day, looking at a performance report from our social commerce marketplace template (see live demo at: https://getmarketplace.co/ ), I decided to do something about it and add WebP versions of the biggest images.
Why only the biggest images? Because the bigger the image, the bigger the savings.
Saving 20% from a 9 KB lazy-loaded image is a good thing, but saving 20% from 3 images eagerly-loaded, 500 KB each, is much better.
Browser compatibility
Not all browsers support WebP, so you'll need a fallback for those browsers. Luckily, the picture HTML tag takes care of that.
Read about browser support for WebP at caniuse.com: https://caniuse.com/?search=webp
In any case, you can use WebP nowadays with a fallback to JPEG - read how to do it (and more) in this excellent CSS-Tricks article.
platformOS image versions
Users very rarely have images in an optimal format or version. Often users upload photos straight from their camera or photos in PNG format. More often than not, you want to recompress those images to fit your performance and quality vision. We implemented a feature that allows the site owner to decide what to do with user-uploaded images.
After the user uploads the image directly to cloud storage to speed up things by eliminating intermediaries, a function takes the original file and generates new versions based on the configuration defined in a YML file. It usually takes so little time that the user will not notice when it happens, as it happens in the background, asynchronously.
In our case, the basic configuration looked like this:
name: photo
properties:
  - name: photo
    type: upload
    options:
      versions:
        - name: uncropped
          output:
            format: jpeg
            quality: 80
This means whatever image the user uploads will be available to use in its original form and an additional JPEG file will be generated called uncropped with quality 80. We wanted to also have this image in WebP format, so I added the second version to the array:
- name: uncropped_webp
  output:
    format: webp
    quality: 70
HTML and Liquid
To show the images we have to get objects from GraphQL and retrieve URLs to the generated versions:
<picture>
  <source srcset="{{ p.photo.versions.uncropped_webp }}" type="image/webp" alt="{{ item.name }}">
  <source srcset="{{ p.photo.versions.uncropped }}" type="image/jpeg" alt="{{ item.name }}">
  <img src="{{ p.photo.versions.uncropped }}" alt="{{ item.name }}">
</picture>
Results
I uploaded three photos straight from my smartphone:
[3.5M]  IMG_20201105_144639.jpg
[4.2M]  IMG_20201109_194144.jpg
[3.2M]  IMG_20201115_001933.jpg
They are very big in terms of dimensions (4608x2592 px) and size, so I expected to see a lot smaller files at the end of this experiment.
Recompression to quality 80 in JPEG gave pretty good results:
[1.5M]  uncropped_IMG_20201105_144639.jpg
[1.9M]  uncropped_IMG_20201109_194144.jpg
[1.3M]  uncropped_IMG_20201115_001933.jpg
Let's compare them to the WebP version (quality 70):
[1.0M]  uncropped_webp_IMG_20201105_144639.webp
[1.0M]  uncropped_webp_IMG_20201109_194144.webp
[996K]  uncropped_webp_IMG_20201115_001933.webp
The images vary in many ways, including color distribution or the numbers of edges. Because results depend on image content, an average is most often used when describing compression results. The smallest difference was 23%, and the biggest was 48%. That's a huge variance. In total, those three images saved 1.7 MB.
Summary
├── [ 11M]  original
│   ├── [3.5M]  IMG_20201105_144639.jpg
│   ├── [4.2M]  IMG_20201109_194144.jpg
│   └── [3.2M]  IMG_20201115_001933.jpg
├── [4.7M]  processed-jpeg
│   ├── [1.5M]  uncropped_IMG_20201105_144639.jpg
│   ├── [1.9M]  uncropped_IMG_20201109_194144.jpg
│   └── [1.3M]  uncropped_IMG_20201115_001933.jpg
└── [3.0M]  processed-webp
    ├── [1.0M]  uncropped_webp_IMG_20201105_144639.webp
    ├── [1.0M]  uncropped_webp_IMG_20201109_194144.webp
    └── [996K]  uncropped_webp_IMG_20201115_001933.webp
Saving 1.7 MB (or 36%) on three images without noticeable quality degradation is a success in my book. We could turn up the quality knob higher, and we'd still have plenty of headroom not to lose any detail at all. It is a good result for a couple of lines of code. Especially if the image you are optimizing is a crucial piece of content (in our case, an item photo) and not some stock photo.
If you want to check out how the files are different visually, you can view them on my GitHub.

